Newsletters
 Getting started
In this article, you can find information about the newsletter functionality, which allows customers to register to a newsletter list, which can be sent to third-party applications via API, like Bloomreach. It is possible to create newsletter groups to categorize types of customers.
Table of contents:
- Functionality configuration
- Registration for the newsletter subscription
- Managing subscribers
- Managing subscriber groups
- Subscribers import
- Subscribers export
Functionality configuration
To enable the customers to register for the newsletter on the website it needs to be first enabled in the system settings. Newsletter configuration can be found in:
System > System / Settings > Built-in Functions > Newsletter
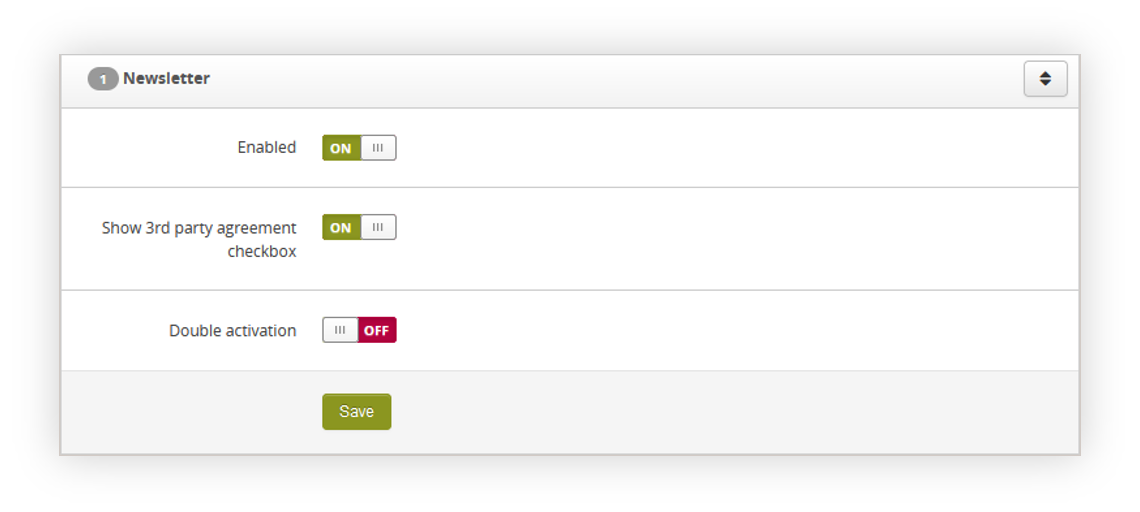 |
| Visualization of the newsletter functionality system settings |
-
Enabled - Switch which enables / disables the functionality and the ability to use it by
the customers. - Show 3rd party agreement checkbox - Switch defining if the 3rd party newsletter agreement should be visible while registering a new account instead of a built-in agreement. This option requires properly configuring the agreement on a 3rd party platform.
- Double activation - A switch defining whether unregistered customers should confirm the newsletter subscription in a separate e-mail, before signing them in.
Additionally, the title of the newsletter confirmation e-mail can be changed in the
System > System / Settings > General > E-mails
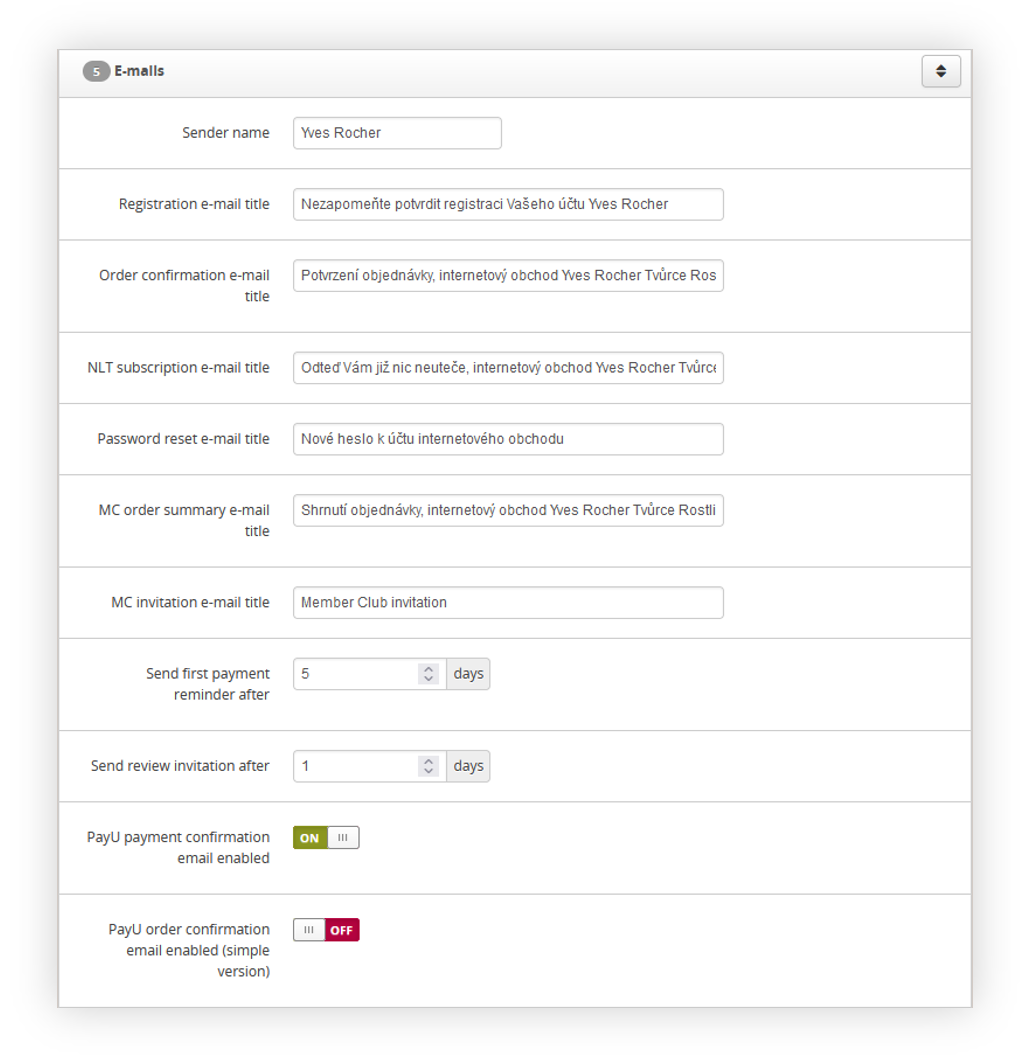 |
| Visualization of the E-mails tab in the System / Settings |
Registration for the newsletter subscription
Logged-out customers
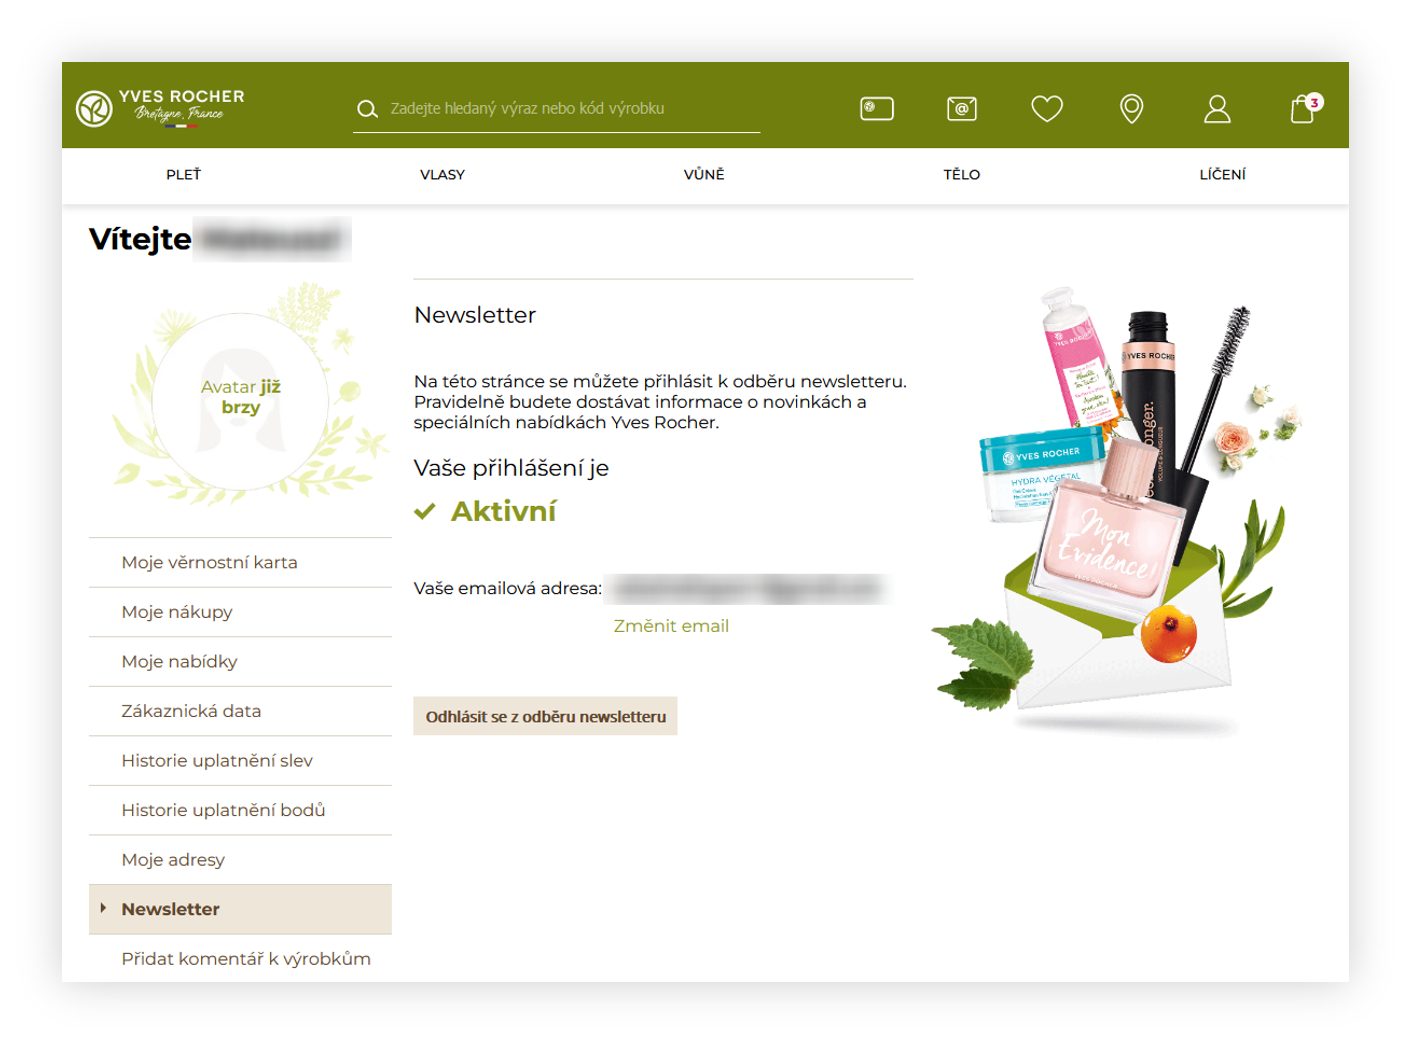
Customers who do not have an account on the e-commerce platform, or are not logged in are able to register for the newsletter using the /newsletter webpage. Usually, the /newsletter webpage is linked in the e-commerce platform footer, but that depends on Yves Rocher needs.
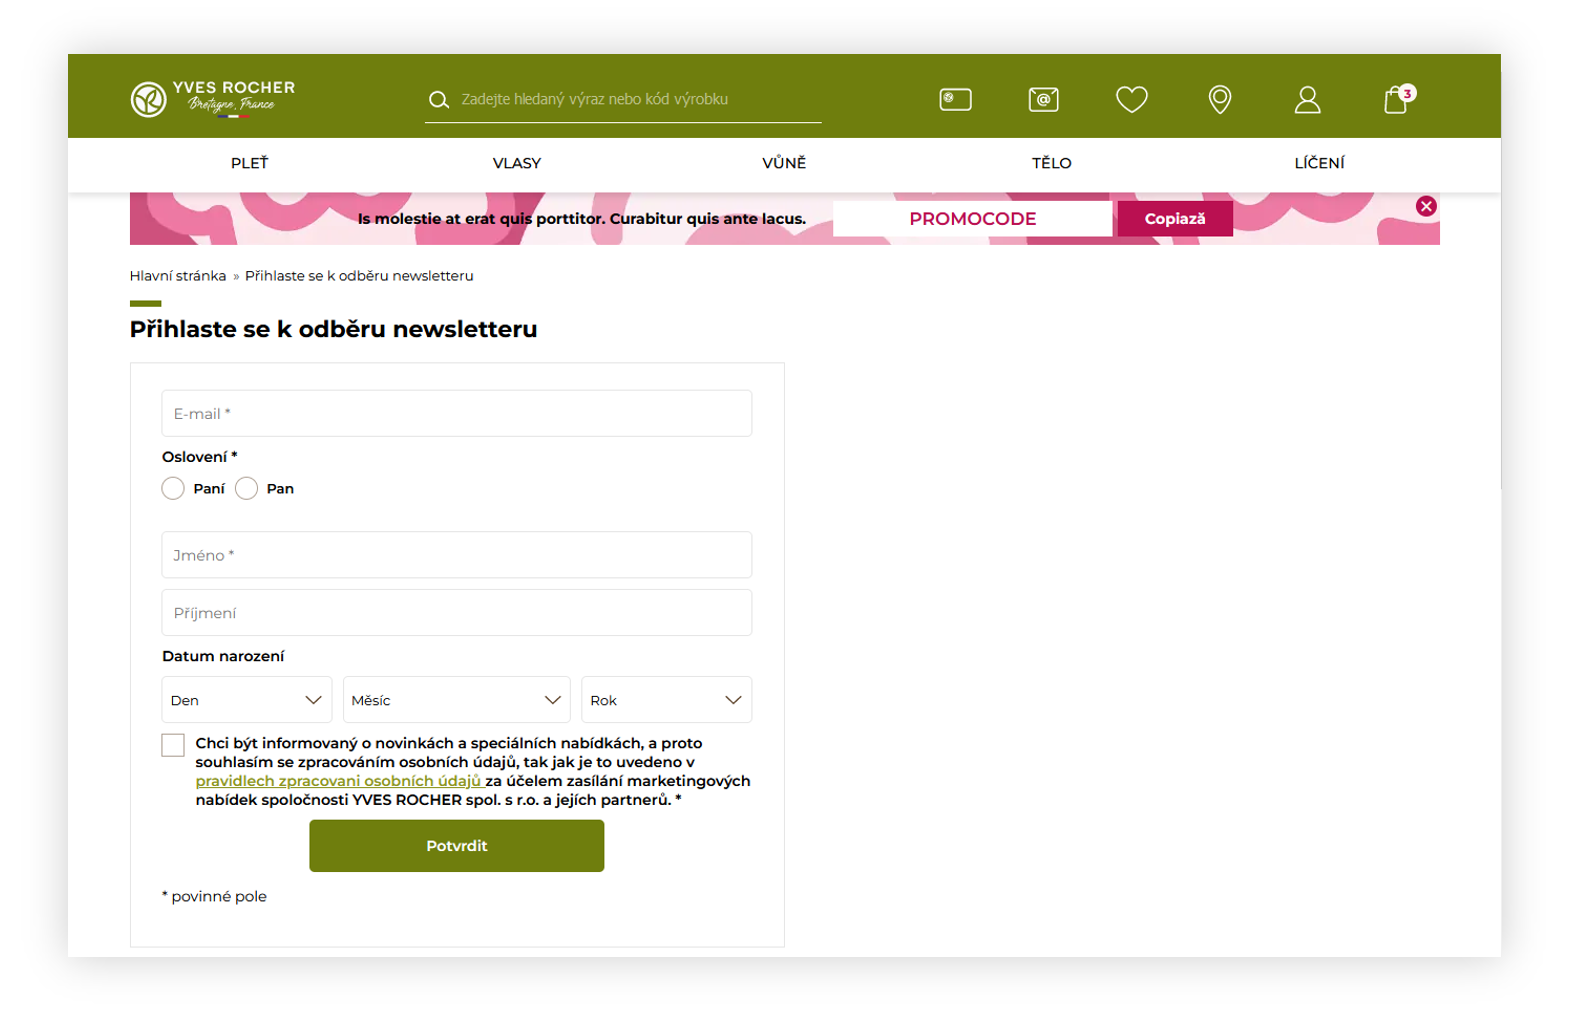 |
| Visualization of the /newsletter page |
During registration
During the registration process, when the customer selects the agreement, that they agree to an e-mail communication they will sign in to the newsletter list.
 |
| Visualization of the registration form |
Same as for logged-out customers when the Double activation is activated in the System / Settings customers will receive an e-mail confirmation if they want to register for a newsletter. If this functionality is disabled, the customers will instantly join the newsletter list. Customers are able to cancel their subscription using the URL in the newsletter or from the customer panel described in Logged-in customers.
Logged-in customers
Registered and logged-in customers are able to register to the newsletter functionality in their customer panel by accessing the /customer/newsletter option. Logged-in customers will also get redirected to this webpage when they access the previously mentioned /newsletter URL.
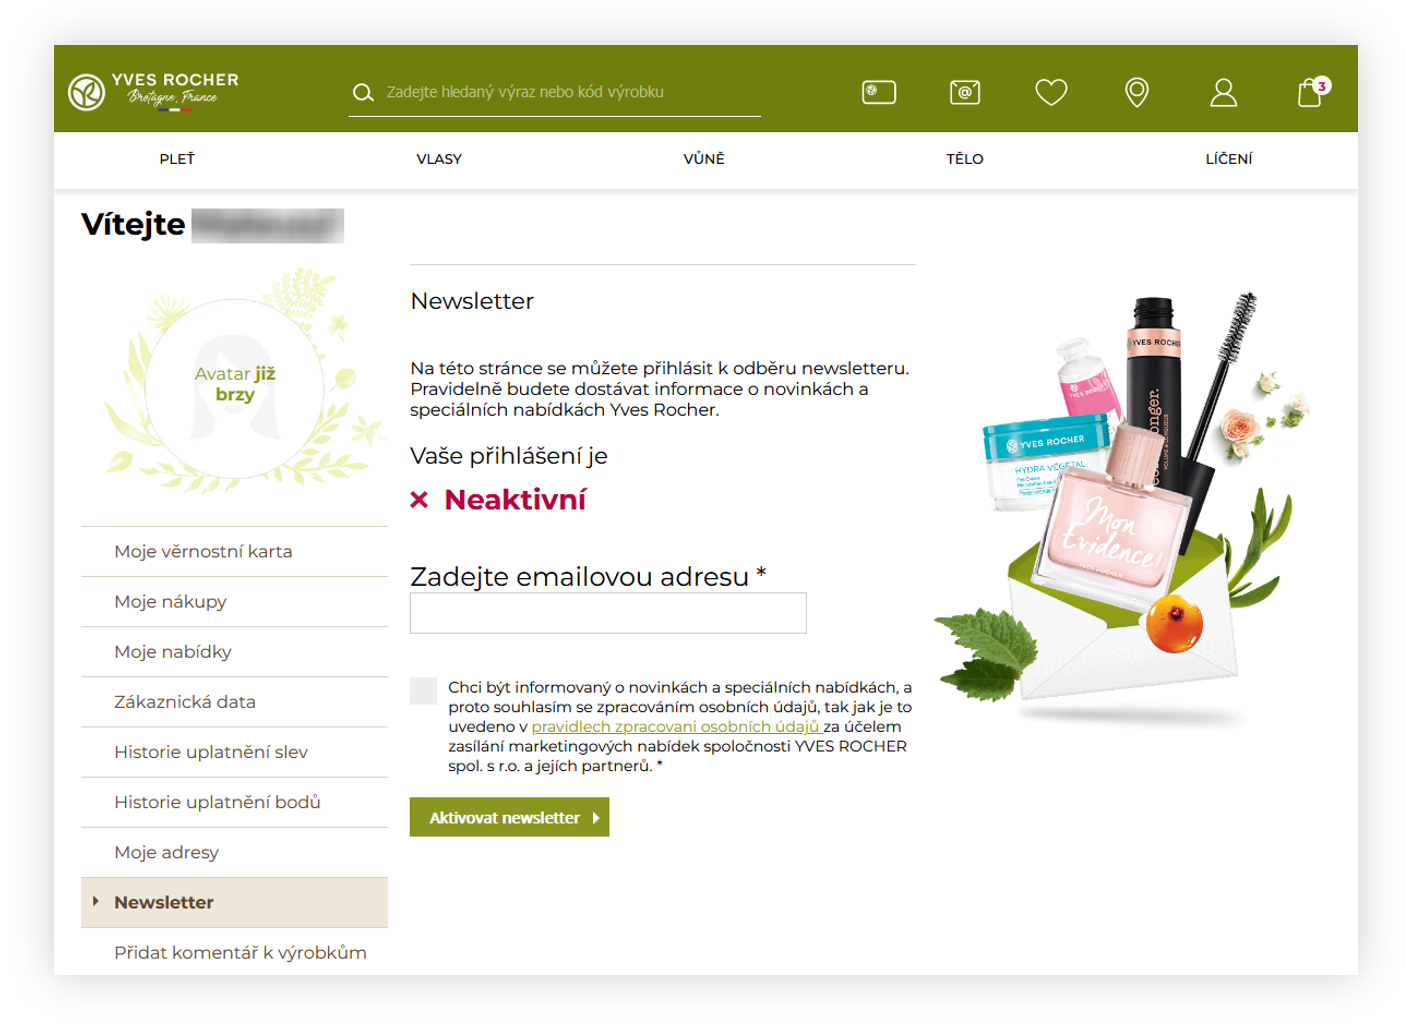 |
| Visualization of the /customer/newsletter page |
In the /customer/newsletter webpage customer only has to fill in their e-mail address and are able to register to the newsletter list. Customers registering to the newsletters this way do not have to accept the newsletter registration even if the Double activation is enabled.
 |
| Visualization of the /customer/newsletter page |
When the customer is logged-in and registered to a newsletter functionality they are able to cancel their subscription from the /customer/newsletter webpage.
Managing subscribers
All customers that are registered for a newsletter functionality, or have canceled their subscription can be found in the admin panel. Subscribers list is located in the:
Customers > Subscribers / list
This tab contains filters, which will help manage the desired customers
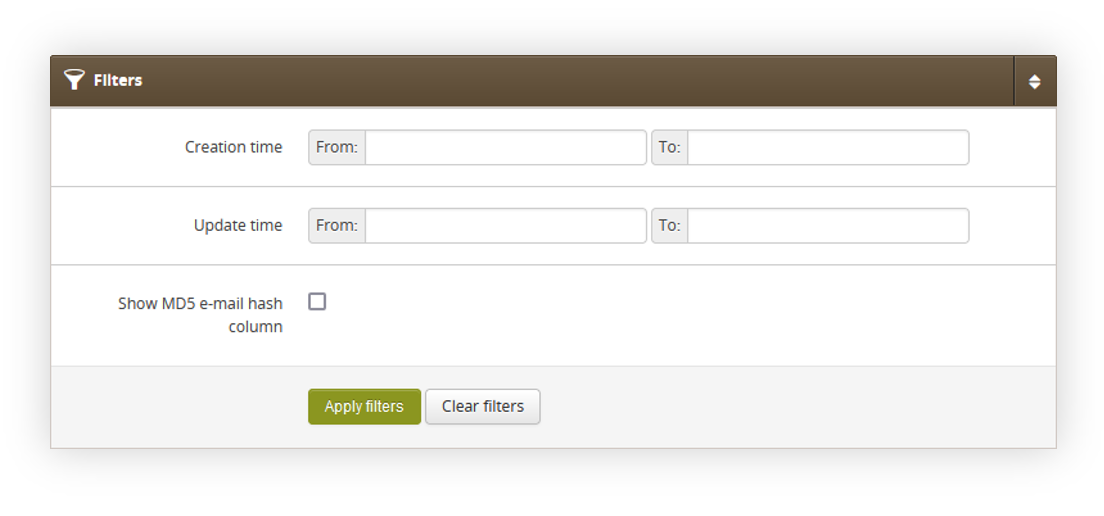 |
| Visualization of the Subscribers / list filters |
There are the following filters available:
- Creation time - A time range when the subscribers were created
- Update time - A time range when the subscribers were last updated
- Show MD5 e-mail hash column - Adds a new column that contains MD5 e-mail hash
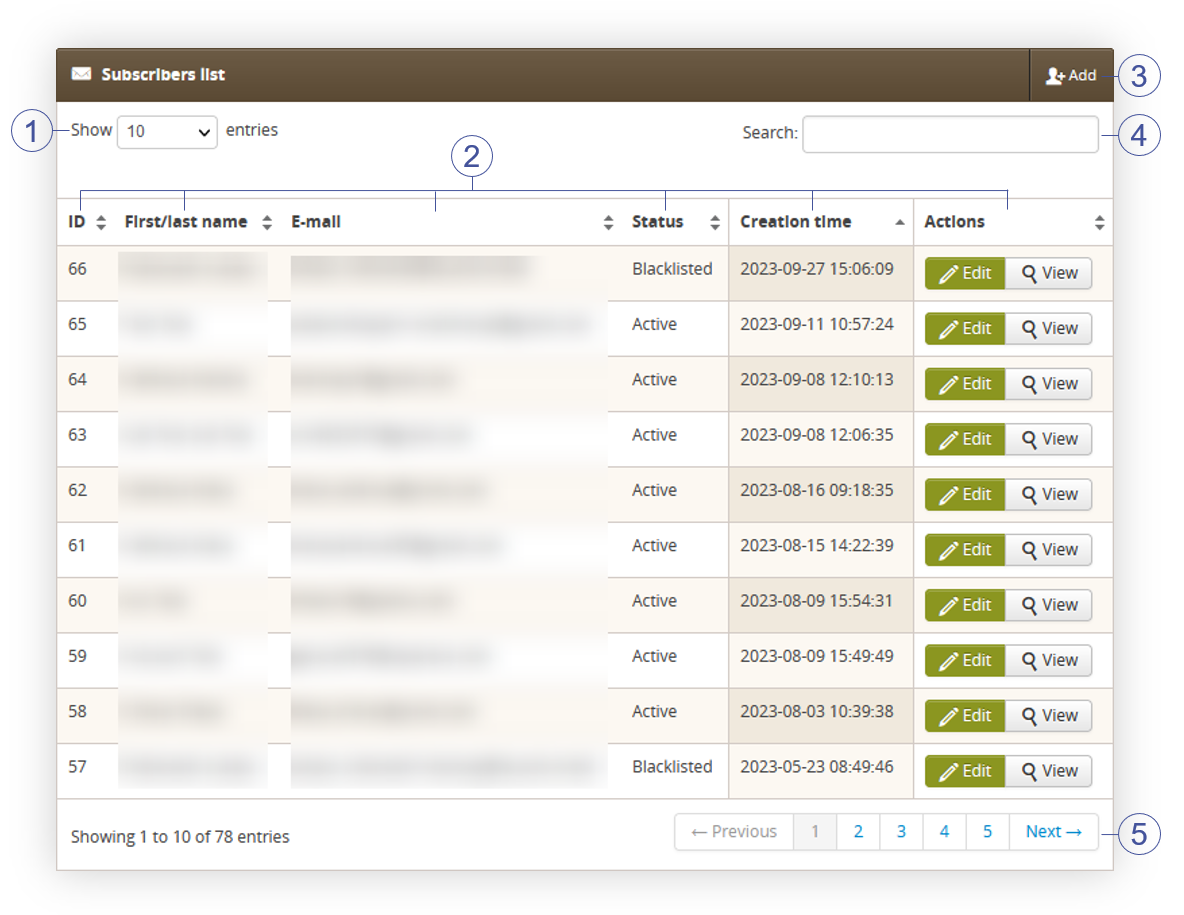 |
| Visualization of the Subscribers list tab |
In the subscriber list table you can find the following options:
- (1) Show X Entries allows to filter how many entries should be visible at once
-
(2) Various table columns. All of them can be sorted by clicking on them.
- ID - Subscribers internal ID
- First/last name - Subscribers first and last name
- E-mail - Subscribers e-mail address
- Status - Subscribers status. Available statuses are Active and Blacklisted. Blacklisted customer unsubscribed to the newsletter, or was manually blacklisted, and won't receive receive newsletter e-mails.
- Creation time - A date and hour when the customer has subscribed to a newsletter.
-
Actions - Two available actions:
- Edit - Allows to edit the selected customer. More about adding and editing the customer can be found below
- View - View the selected subscriber. Viewing doesn't allow to edit any data.
- (3) Add button allows to manually add a new subscriber. Adding and editing a subscriber looks exactly the same. Below you can find more information about the available fields, when adding or editing a new customer.
- (4) Search field allows to search the subscribers by their name / surname as well as their e-mail address.
- (5) Pages list allows to show the next batch of customers on the another pages accoriding to applied sorting option and filters.
 |
|
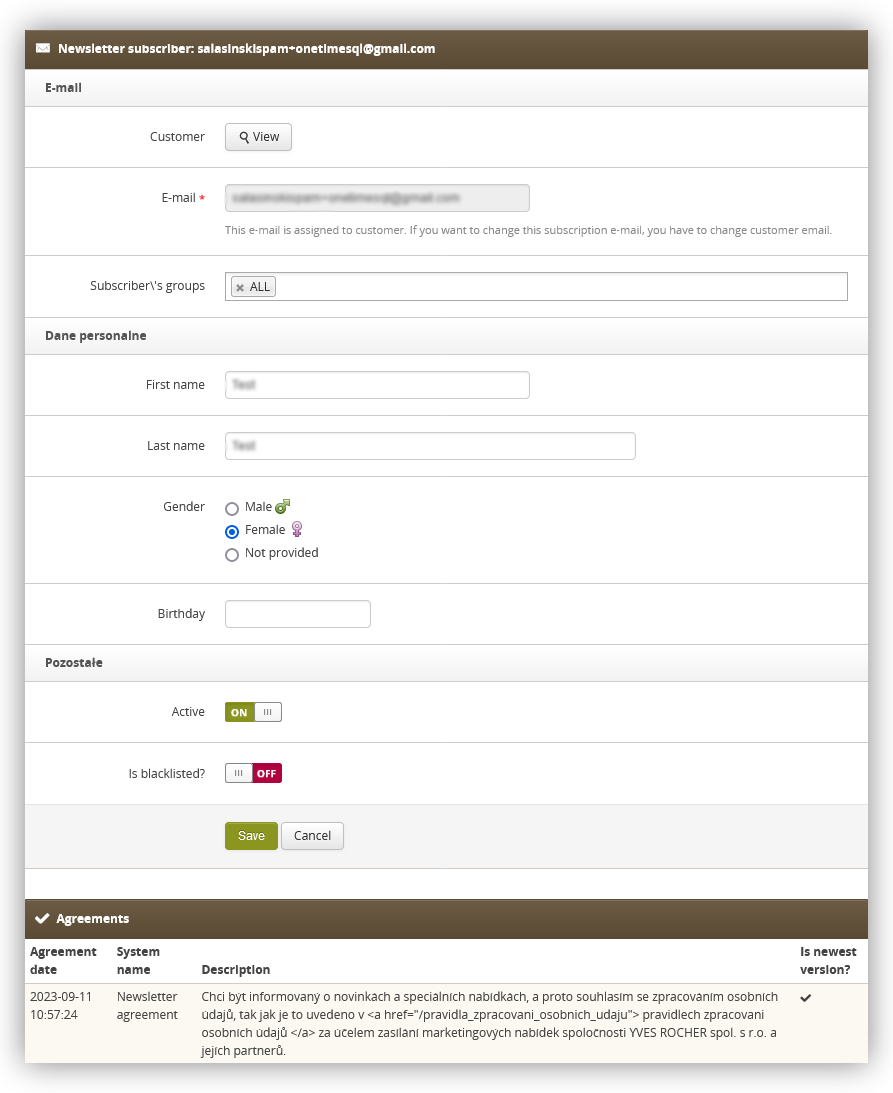
Visualization of the customer in the subscribers / list |
When editing or adding a new customer you can find there the following fields:
Additionally, all agreements the subscriber has agreed on will be visible at the bottom of the page.
Managing subscriber groups
Subscribers can be put in subscriber groups, which allows to easily manage them, and send a desire newsletters to a certain selected group. Subscriber groups can be manged in
Customers > Subscribers groups
 |
|
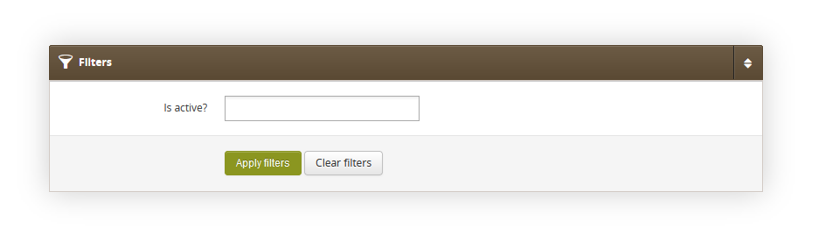
Visualization of the filters in subscribers groups. |
Subscribers groups filters allow to filter by is active? flag, which defines if the selected group is set as active or not.
 |
|
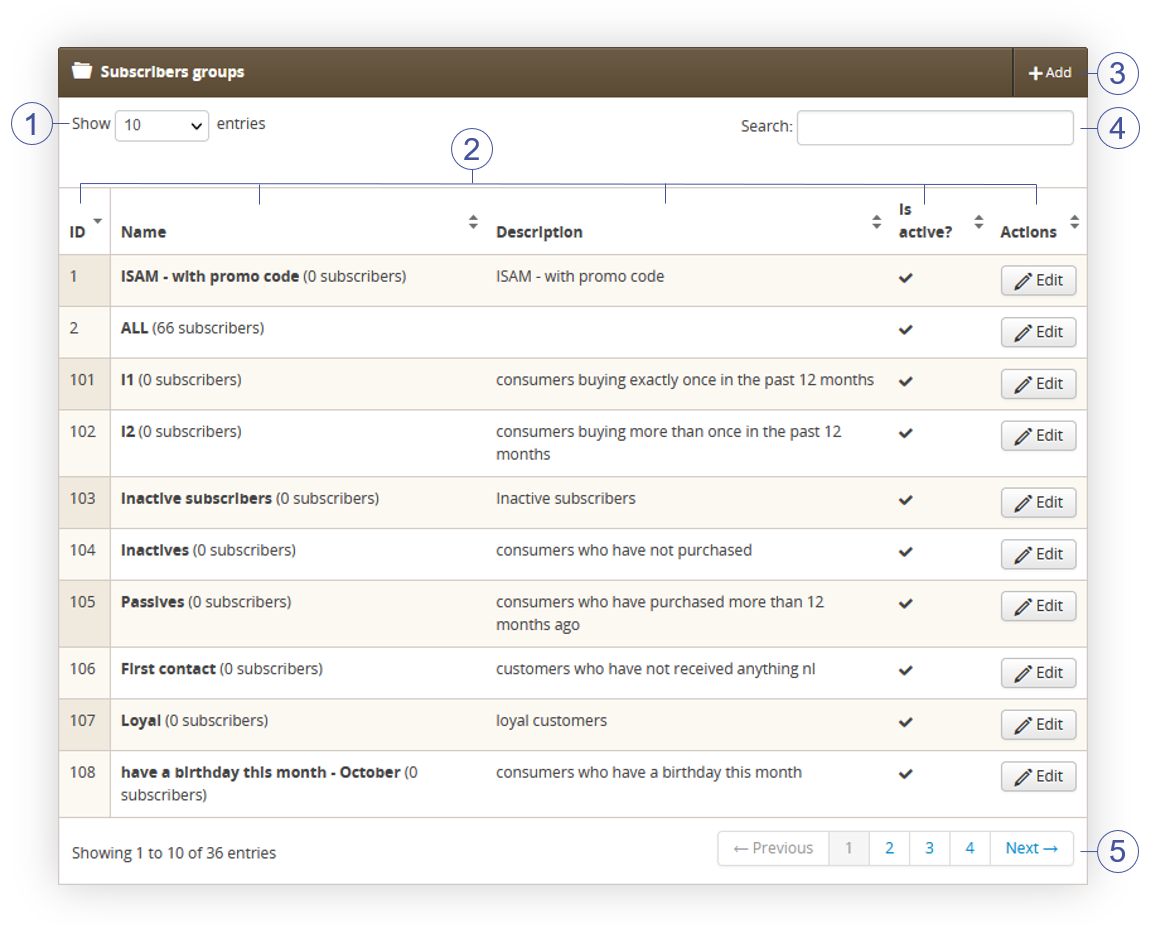
Visualization of the subscribers groups |
In the subscribers groups table you can find the following options:
- (1) Show X Entries allows to filter how many entries should be visible at once
-
(2) Various table columns. All of them can be sorted by clicking on them.
- ID - Subscriber group internal ID
- Name - Internal name of a subscriber group.
- Description - Short description of a subscriber group.
- Is active? - Subscriber group activity status.
-
Actions
- Edit - Allows to edit the selected subscriber group. More about adding and editing the customer can be found below
- (3) Add button allows to addition of a new subscriber group. Adding and editing a subscriber looks exactly the same. Below you can find more information about the available fields, when adding or editing a new group.
- (4) Search field allows to search the subscribers groups by their name.
- (5) Pages list allows to show the next batch of groups on the another pages accoriding to applied sorting option and filters.
 |
|
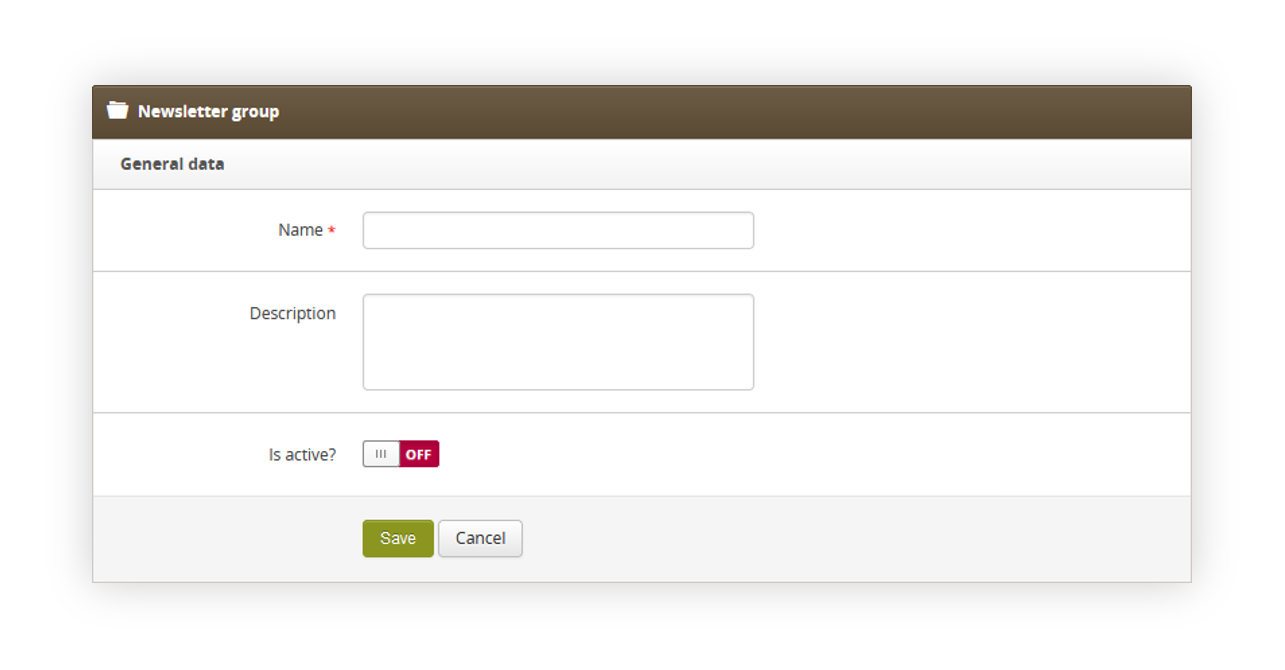
Visualization of the subscriber group creation |
In the subscriber group creation / edition you can define the following fields:
- Name (mandatory) - An internal name of a subscriber group.
- Description - Internal description of a subscriber group.
- Is active? - An activity flag, which defines if the selected group is active for use.
Subscribers import
Subscribers can be imported using the import functionality located in
Import / Export > Import
 |
|
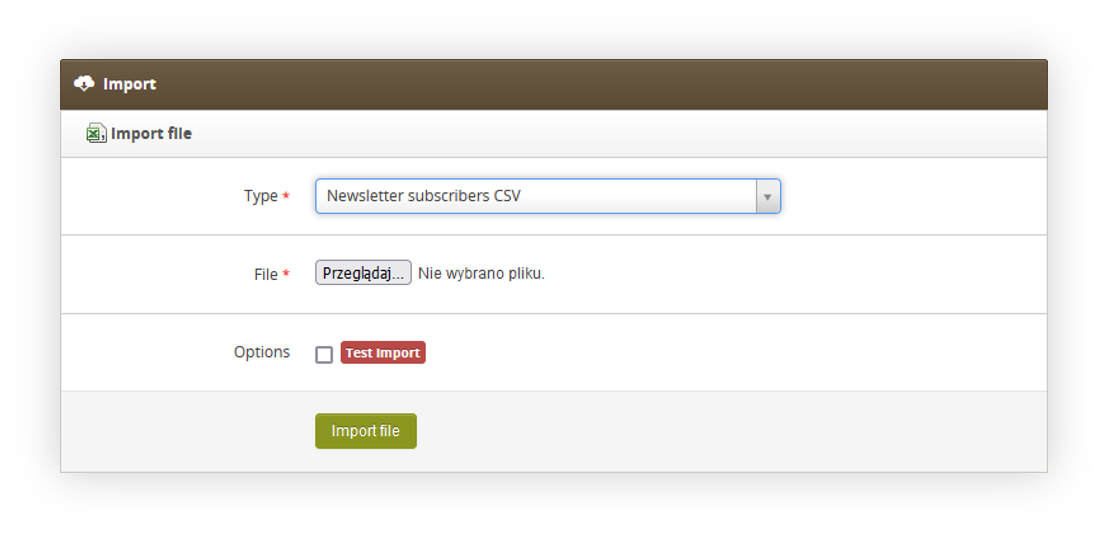
Visualization of the subscribers import |
In order to import subscribers you have to select the "Newsletter subscribers CSV" option and select the prepared .csv file.
 |
|
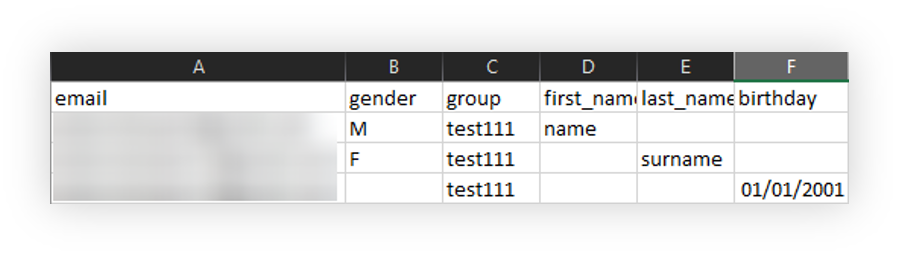
Visualization of the subscribers csv file |
Subscribers .csv file can have any file name and must contain the following columns:
- email (mandatory) - Customers e-mail address.
- Gender - Customers gender. Accepted values are M for males and F for females.
- Group - Subscriber group internal name. This field will assign the selected customer to a selected subscriber group.
- first_name - Customers first name
- last_name - Customers last name
- birthday - Customers birthday in DD/MM/YYYY format.
Subscribers export
Subscriber lists can be exported using the:
Import / Export > Export / Subscribers
 |
|
Visualization of the subscribers csv file |
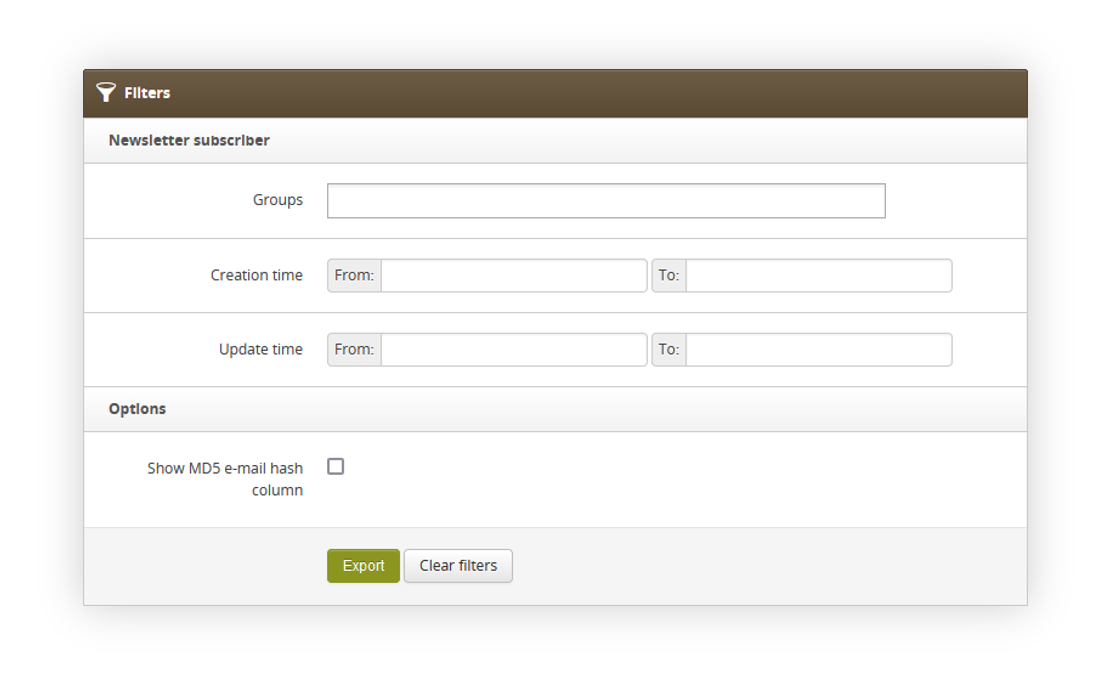
In the Export / Customers you can filter out desirable data by using the selected filters:
- Groups - A list of selectable subscriber groups that should be exported.
- Creation time - A range of dates whenever the subscriber was created.
- Update time - A range of dates whenever the subscriber was updated.
- Show MD5 e-mail hash column - Adds the MD5 e-mail hash column in the exported file.
By pressing the "Export" button the file will be exported with the selected filters.
 |
|
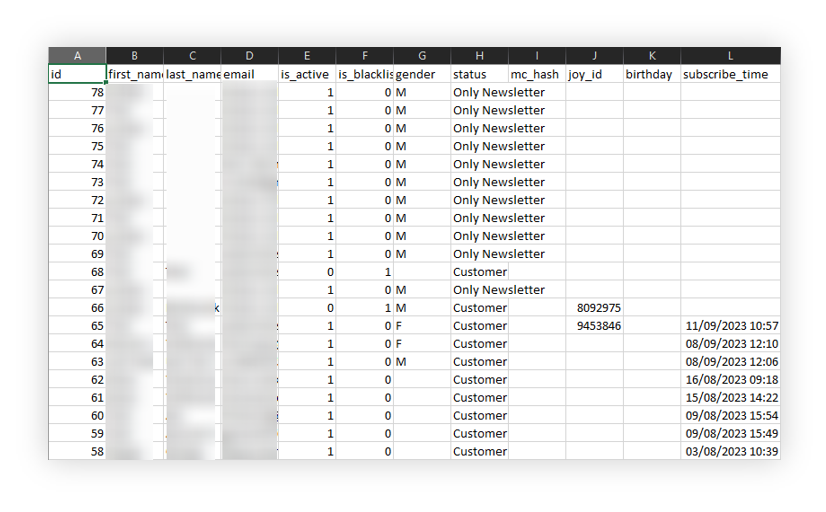
Visualization of the exported subscribers file |
In the exported subscribers file you can find the following columns:
- ID - Subscriber internal ID.
- First_name - Customers first name.
- Last_name - Customers last name.
- Email - Subscribers e-mail address.
- is_active - Activity status of a subscriber. 1 means active, 0 means not active.
- is_blacklisted - blacklisted status of a subscriber. 1 is blacklisted, 0 is not blacklisted.
- Gender - Customers gender. M is for Male, F is for Female.
-
Status - Subscribers status. Available statuses are:
- Only newsletter - Customer is only registered to the newsletter communication and doesn't have an account on a e-commerce platform.
- Customer - The customer has a created account on an e-commerce platform
- Mc_hash - MD5 e-mail hash. This field is only visible if the Show MD5 e-mail hash column filter was selected.
- Joy_id - Customers JOY ID.
- Birthday - Customers birthday date.
-
Subscribe time - A date with an hour when the customer has subscribed to an
e-mail communication.